How To Add Bootsplash Image To Your OS Template

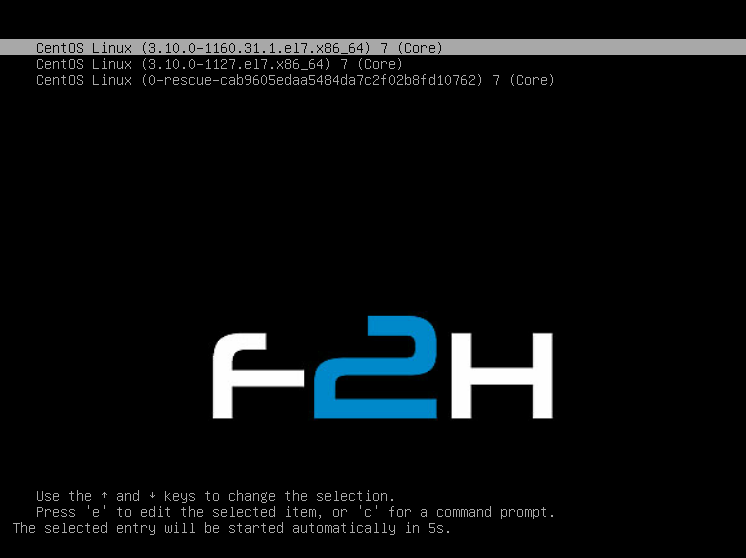
Instead of the default black screen. When creating an OS template you can choose to add a bootsplash image to your bootloader screen. When the user selects a Kernel you can fill that screen with any image you would like. We’re going to modify our CentOS Cloud-init template from our NVMe VPS network to add a Bootsplash image on the bootloader.
Download Bootsplash Image
The optimal size for your image is 640×480 and can be in any of the usual formats like .jpg. First, you need to ensure your image is somewhere you can download it to your server.
cd /boot/grub
wget https://www.first2host.co.uk/servers/bootsplash.jpg
Update Grub
Now we need to tell GRUB that we have a boot splash image and that we want to display it on the bootloader screen. We need to edit the grub config file located in at /etc/default/grub. We add the following line specifying the location of our image.
Instead of the default black screen. When creating an OS template you can choose to add a bootsplash image to your bootloader screen. When the user selects a Kernel you can fill that screen with any image you would like. We’re going to modify our CentOS Cloud-init template from our NVMe VPS network to add Bootsplash image on the bootloader.
Download Bootsplash Image
The optimal size for your image is 640×480 and can be in any of the usual formats like .jpg. First, you need to ensure your image is somewhere you can download it to your server.
cd /boot/grub
wget https://www.first2host.co.uk/servers/bootsplash.jpg
Update Grub
Now we need to tell GRUB that we have a boot splash image and that we want to display it on the bootloader screen. We need to edit the grub config file located in at /etc/default/grub. We add the following line specifying the location to our image.

That’s it. You have created a .jpg bootsplash image and updated grub to display the image in the console at boot. This process can be used when creating templates for containers and VMs to use. Check out our blog post on how to create templates using Cloud-init.

