


If you have been following our series of articles on installing and managing a Postfix email server, you may want to use more than one domain name on your Postfix email server. Configuring multiple domains on Postfix is possible if you have installed Postfixadmin. We completed that in part 4 of this series. This is part 6. We are assuming you have followed, at minimum Parts 1, 2, 3, 4. So in this article, we will configure another domain in Postfixadmin, set up the correct DNS records and then apply SPF and DKIM to the new domain.
Articles In This Series
- Part 1 – Install Postfix in Ubuntu Servers
- Part 2 – Install Dovecot IMAP/POP3 with SSL/TLS
- Part 3 – Configure Postfix DKIM & SPF Records
- Part 4 – Install Postfixadmin on Postfix Ubuntu Servers
- Part 5 – Install RoundCube Webmail on Ubuntu Postfix servers
- Part 6 – Configure Multiple Email Domains in Postfix Email Server (This Article)
- Part 7 – Configure PostFixAdmin and RoundCube High Availability Email Servers
- Part 8 – Configure DKIM, SPF and DMARC on Second (multiple) Postfix Email Servers
- Part 9 – Load Balance PostFixAdmin, RoundCube and Postfix Email
Configure DNS Records
Choose what subdomain you would like to use to connect to the domain and fetch mail. The default is usually mail.domain.com. Add the following DNS records. In the following examples, we are using the domain name wsc.pw.
| DNS Record Type | Name | Value |
| MX | @ | mail.wsc.pw |
| A | Server IP | |
| TXT | @ | v=spf1 mx ~all |
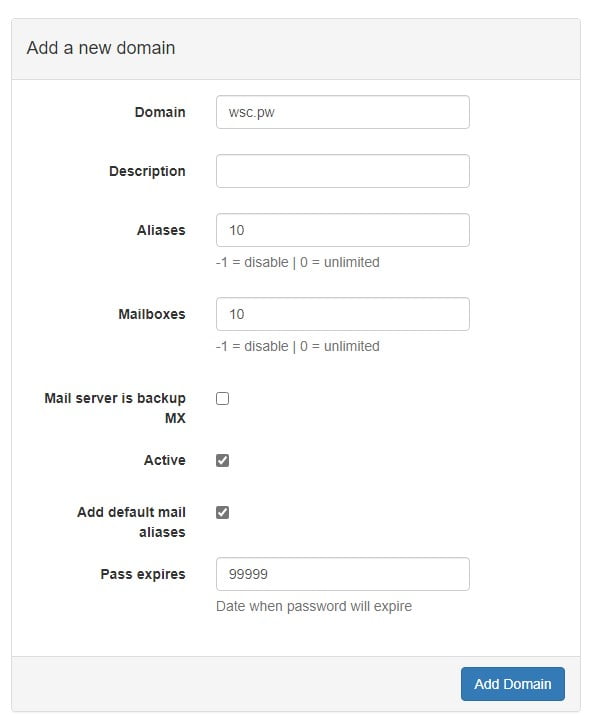
Add Domain To Postfixadmin
Login to Postfixadmin and navigate to Domain List > New Domain. Just like the first time round add your additional domain name as usual.
Configure DKIM
In part 3 of this series, we installed OpenDKIM on our Postfix VPS server. The process to sign a second domains email with DKIM is quicker this time around. So open the /etc/opendkim/signing.table
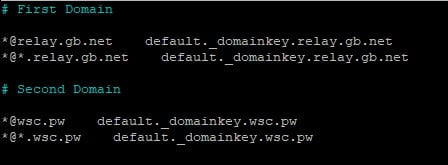
nano /etc/opendkim/signing.table# Second Domain
*@wsc.pw default._domainkey.wsc.pw
*@*.wsc.pw default._domainkey.wsc.pwUnderneath the first domain we configured, add the new domain name. After the edits, the file will look like this.
And in the /etc/opendkim/key.table file. Do the same. Duplicate the original and edit it for the second domain name.
nano /etc/opendkim/key.tableAfter the edits that file will look like this.
# First Domain

default._domainkey.relay.gb.net     relay.gb.net:default:/etc/opendkim/keys/relay.gb.net/default.private

# Second Domain

default._domainkey.wsc.pw     wsc.pw:default:/etc/opendkim/keys/wsc.pw/default.private
In the /etc/opendkim/trusted.hosts add the second domain.
nano /etc/opendkim/trusted.hosts


127.0.0.1
localhost
.relay.gb.net
.wsc.pw
Generate Public & Private Keypair
Next, we need to generate a new public and private key pair for the second domain name we are adding. But first, create a directory to store the keys.
mkdir /etc/opendkim/keys/wsc.pwAnd now generate the keypair with OpenDKIM.
opendkim-genkey -b 2048 -d wsc.pw -D /etc/opendkim/keys/wsc.pw -s default -vJust like in Part 3. The private key is located in the default.private file and the public key is stored in the default.txt file. Ensure OpenDKIM is the owner of the private key.
chown opendkim:opendkim /etc/opendkim/keys/wsc.pw/default.privateNow display the public key that was just created.
cat /etc/opendkim/keys/wsc.pw/default.txtNext, add the public key to your DNS manager for the second domain name. Remember that the public key is the string between the ” ” in the displayed file above. There are two sections. Copy BOTH strings and combine them into one long string.
 "p=MIIBIjANBgkqhkiG9w0BAQEFAAOCAQ8AMIIBCgKCAQEArDTenj6WhCfUwFqcxuAApRA1EYPvFrdOWdL057rb640UrkjoupZ5Km02bYiLvaKSwaoZTs/EcmY2NOwyim22Zjx8JcolD1ghuLS2QlVwWnfRluMPNJhGzfTnLISaju94lIG0ss+JmSBPqSh/70d28k/IqJ6dxO5MvqHbxNLSeR4Jd67g3DqsCp+eDpDPfcqgWhLtagM+H++pje"
          "fFizUGexgwENK2FOi6MIB2P4TU1VghA8e1jGnnNFwj5LM55Ik3DpJOIx91JiU4sc/mc6S3TqJ1bg4MzStlaSqqzkAS7gdURhJGenf2df2tzPpgDT9YwGZWbAOAcM+W6PgzCFIrBQIDAQAB"
Would become
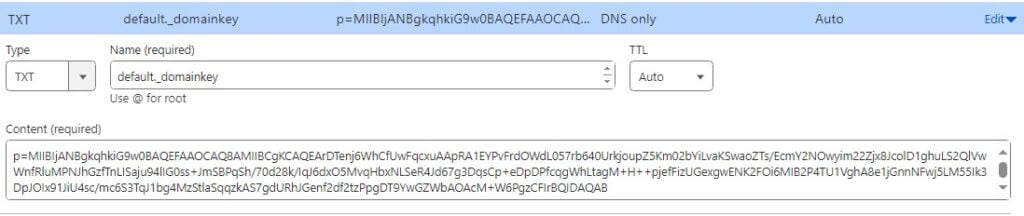
p=MIIBIjANBgkqhkiG9w0BAQEFAAOCAQ8AMIIBCgKCAQEArDTenj6WhCfUwFqcxuAApRA1EYPvFrdOWdL057rb640UrkjoupZ5Km02bYiLvaKSwaoZTs/EcmY2NOwyim22Zjx8JcolD1ghuLS2QlVwWnfRluMPNJhGzfTnLISaju94lIG0ss+JmSBPqSh/70d28k/IqJ6dxO5MvqHbxNLSeR4Jd67g3DqsCp+eDpDPfcqgWhLtagM+H++pjefFizUGexgwENK2FOi6MIB2P4TU1VghA8e1jGnnNFwj5LM55Ik3DpJOIx91JiU4sc/mc6S3TqJ1bg4MzStlaSqqzkAS7gdURhJGenf2df2tzPpgDT9YwGZWbAOAcM+W6PgzCFIrBQIDAQABSo in your DNS Manager create a new TXT record with the name default._domainkey and in the value past the long string you just created including the p=. It will look similar to this.
Next test that the key is correct.
opendkim-testkey -d wsc.pw -s default -vvv

opendkim-testkey: using default configfile /etc/opendkim.conf
opendkim-testkey: checking key 'default._domainkey.wsc.pw'
opendkim-testkey: key not secure
opendkim-testkey: key OK
Remember that it’s normal to see the message Key not secure. It means DNSSEC is not enabled for your domain name. Restart OpenDKIM.
systemctl restart opendkimConfigure OpenLiteSpeed Virtual Host
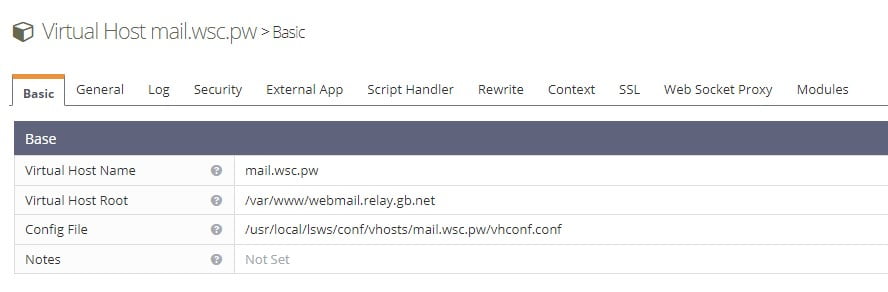
Next we are going to create a new virtual host in OLS. This will be called mail.wsc.pw and its virtual host root will point to our existing RoundCube directory.
/bin/bash <( curl -sk https://raw.githubusercontent.com/litespeedtech/ls-cloud-image/master/Setup/vhsetup.sh ) -d mail.wsc.pwOnce created log in to the OpenLiteSpeed control panel at https://IPv4:7080. Navigate to Virtual Hosts and select the virtual host you just created. In our previous article, we placed the Roundcube files in the directory /var/www/webmail.relay.gb.net. Update the virtual host root for the new domain name to reflect the same path.
Restart OpenLiteSpeed.
systemctl restart lswsGenerate SSL Certificate
Use Certbot to generate a new SSL Certificate for the new domain name. However, this time you need to update the existing certificate on the server to contain the new domain names. You also need to ensure the certificate is named the same as in Part 2 of this series. This will save you from having to update the Dovecot and Postfix configuration with the new certificate name.
certbot certonly -d m1.relay.gb.net -d mail.wsc.pw -d webmail.relay.gb.net --cert-name m1.relay.gb.netCertbot will provide a warning in the console saying you are updating the existing certificate to include new domain names.
You are updating certificate m1.relay.gb.net to include new domain(s):
+ mail.wsc.pw
+ webmail.relay.gb.net

You are also removing previously included domain(s):
(None)

Did you intend to make this change?
- - - - - - - - - - - - - - - - - - - - - - - - - - - - - - - - - - - - - - - -
(U)pdate certificate/(C)ancel: u
Renewing an existing certificate for m1.relay.gb.net and 2 more domains

Successfully received certificate.
Certificate is saved at: /etc/letsencrypt/live/m1.relay.gb.net/fullchain.pem
Key is saved at:         /etc/letsencrypt/live/m1.relay.gb.net/privkey.pem
This certificate expires on 2024-06-08.
These files will be updated when the certificate renews.
Certbot has set up a scheduled task to automatically renew this certificate in the background.
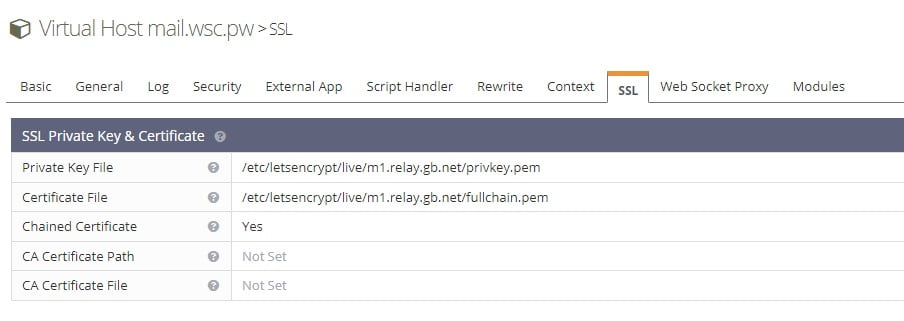
Certbot is also telling us it’s configured itself to update the certificate when it’s up for renewal. Thanks Certbot! So now in the /etc/letsencrypt/live/m1.relay.gb.net/fullchain.pem file, you have a certificate for multiple domain names. Ensure OLS can read the certificates by setting the correct permissions and restarting LiteSpeed Web Server, Postfix and Dovecot.
setfacl -R -m u:www-data:rx /etc/letsencrypt/live/ /etc/letsencrypt/archive/ && systemctl restart lsws postfix dovecotAt this point, if you are not using Cloudflare you can specify the location of the Certificate and Private key in the OLS control panel for ALL virtual hosts. The path to the certificate is the same for all our domains because they are contained in the same file. Magic!
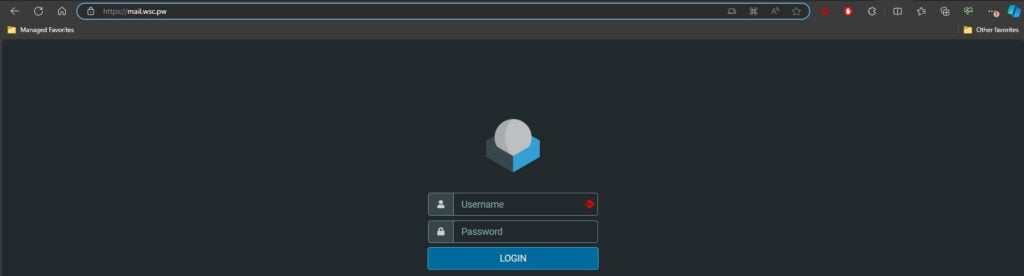
And now you should be able to access RoundCube Webmail using the new domain name you just added. In our examples mail.wsc.pw.
Test New Configuration
To test the new domain name add a new mailbox in Postfixadmin. Access webmail and check if you can log in to the new mailbox. Send a test email to another email address using Gmail or Outlook. You can inspect the headers to ensure DKIM and SPF are configured correctly.
 Transport; Sun, 10 Mar 2024 14:03:51 +0000
Authentication-Results: spf=pass (sender IP is 151.80.124.86)
 smtp.mailfrom=wsc.pw; dkim=pass (signature was verified)
 header.d=wsc.pw;dmarc=pass action=none header.from=wsc.pw;compauth=pass
 reason=100
Received-SPF: Pass (protection.outlook.com: domain of wsc.pw designates
 151.80.124.86 as permitted sender) receiver=protection.outlook.com;
 client-ip=151.80.124.86; helo=m1.relay.gb.net; pr=C
Received: from m1.relay.gb.net (151.80.124.86) by
 DB5EUR02FT058.mail.protection.outlook.com (10.13.59.189) with Microsoft SMTP
 Server (version=TLS1_3, cipher=TLS_AES_256_GCM_SHA384) id 15.20.7386.15 via
 Frontend Transport; Sun, 10 Mar 2024 14:03:51 +0000
X-IncomingTopHeaderMarker:
Magic. We have now configured our Postfixadmin NVMe VPS server to provide email to multiple domain names with DKIM and SPF setup. You can repeat this process to add multiple domains to your Postfix server. In the next article, we will look at providing High Availability to our Postfix server.