


In this article, we are going to learn how to install Roundcube on our OpenLiteSpeed Ubuntu Postfix server. This is Part Five of our Postfix series. In part one we installed Postfix to an Ubuntu VPS Server. For Part Two, we installed Dovecot to facilitate IMAP connections with SSL/TLS authentication. In Part Three we configured DKIM and SPF records for our Postfix server and in Part Four, we installed and configured Postfixadmin. See the links below to check out those articles. You need to have followed Part 1, Part 2, and Part 3 at minimum to install RoundCube Webmail on your Postfix server. For RHEL distributions see Install RoundCube Webmail in CentOS/RockyLinux.
Articles In This Series
- Part 1 – Install Postfix in Ubuntu Servers
- Part 2 – Install Dovecot IMAP/POP3 with SSL/TLS
- Part 3 – Configure Postfix DKIM & SPF Records
- Part 4 – Install Postfixadmin on Postfix Ubuntu Servers
- Part 5 – Install RoundCube Webmail on Ubuntu Postfix servers (This Article)
- Part 6 – Configure Multiple Email Domains in Postfix Email Server
- Part 7 – Configure PostFixAdmin and RoundCube High Availability Email Servers
- Part 8 – Configure DKIM, SPF and DMARC on Second (multiple) Postfix Email Servers
- Part 9 – Load Balance PostFixAdmin, RoundCube and Postfix Email
Install RoundCube Webmail Ubuntu Postfix Server
Please note that as of writing this v1.6.6 was the latest version of RoundCube Webmail. Check https://github.com/roundcube/roundcubemail/releases/ for the latest release and modify the download commands as required.
Download RoundCube
So download the latest release of RoundCube and untar the files. The folder will be named roundcubemail followed by the version number. Use the MV command to move the RoundCube files to the /var/www location. In our command, we are renaming the folder to roundcube. However, you can use any folder name you like.
cd /tmp

wget https://github.com/roundcube/roundcubemail/releases/download/1.6.6/roundcubemail-1.6.6-complete.tar.gz

tar xvf roundcubemail-1.6.6-complete.tar.gz

mv roundcubemail-1.6.6 /var/www/webmail.relay.gb.net
In the next code block, we move to the roundcube directory and CHOWN the files to the webserver user and group. This is usually the same for Apache, NGINX and OpenLiteSpeed. However, if you are using Apache and NGINX consider switching to OpenLiteSpeed. It’s faster than both Apache and NGINX. Provides a control panel, has native caching built-in and access to LiteSpeed PHP.
cd /var/www/roundcube && chown -R www-data:www-data temp/ logs/Install PHP Modules
The default install of OpenLiteSpeed comes packaged with PHP 8.1 out-of-the-box. Magic!. Even better is that it’s packaged with all of the modules you need, except three. Install these with the below command and restart OLS.
apt install lsphp81-intl lsphp81-imagick lsphp81-ldap && systemctl restart lswsThere are optional modules you can install like LDAP and Imagick.
Create MySQL/MariaDB Database & User
If you have followed Part 4 – Install Postfixadmin on Postfix Ubuntu Servers then you are likely running a really cool MariaDB Galera Cluster that is replicating your database to a redundant NVME VPS Server. The next commands will work on MariaDB/Galera and MySQL. Create a database and user to use with RoundCube Webmail.
mysql -u root -p

CREATE DATABASE roundcube;

CREATE USER 'rcadmin'@'localhost';

GRANT ALL PRIVILEGES ON roundcube.* To 'rcadmin'@'localhost' IDENTIFIED BY ')pSe^3NfYeC.';

flush privileges;
Import RoundCube Tables
Located in the /var/www/roundcube/SQL/ folder are the default tables for RoundCube. So import these to the database you just created above.
mysql roundcube < /var/www/roundcube/SQL/mysql.initial.sqlCreate Virtual Host In OpenLiteSpeed
So next we need to create a virtual host in OpenLiteSpeed which is as simple as running a line of code in the console. At this point, you should decide on the URL which you would like to use to access Webmail. Usually, the default is on a subdomain. In the example below we are using the subdomain webmail.relay.gb.net. Login to your Postfix server and run the command.
/bin/bash <( curl -sk https://raw.githubusercontent.com/litespeedtech/ls-cloud-image/master/Setup/vhsetup.sh ) -d webmail.relay.gb.netHowever, if you want to access webmail on your main domain name from a folder /domain.com/webmail you can just move the Roundcube files to the root directory of your website. Next login to the OpenLiteSpeed control panel located at https://IPv4:7080. The password for the control panel is located in the /usr/local/lsws/password if you need it.
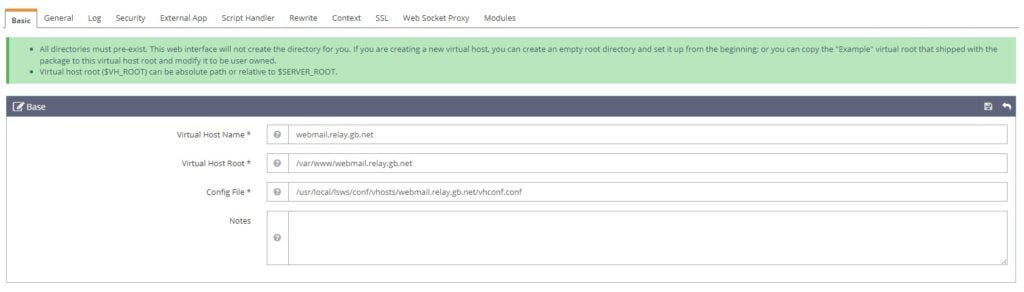
Next, In the OpenLiteSpeed control panel navigate to Virtual Hosts > webmail.relay.gb.net. Double-check the virtual host root points to the directory you used in the first step. We moved the Roundcube files to /var/www/webmail.relay.gb.net and this is the default path OLS should use.
Configure DNS Records
If you are using a subdomain you will need to configure an A record for that subdomain. In the next step, we will request a certificate and your subdomain must be resolving to the server for this to work. However, if you are using Cloudflare for your DNS you can configure the A record and skip the next step. Cloudflare will secure the subdomain automatically.

Next, configure a local DNS record so Roundcube doesn’t query public DNS servers.
nano /etc/hosts

127.0.0.1  localhost webmail.relay.gb.net
Install SSL Certificate
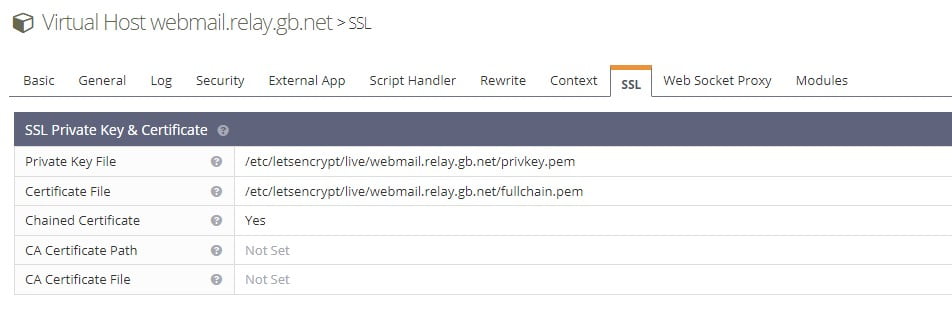
If you want to or need to request an SSL certificate you can do with the commands below. The certificate and private key are added to the SSL Tab in OLS control panel.
apt install certbot -y
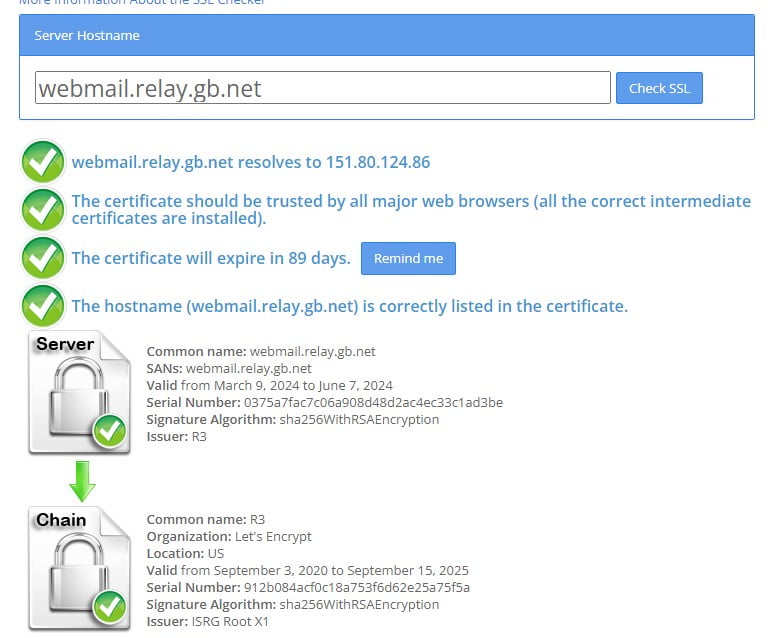
certbot certonly -d webmail.relay.gbWhen requesting the certificate you need to choose option 2 and specify the location to the web root for the virtual host. /var/www/webmail.relay.gb.net in our example. Once complete your certificate will be saved to /etc/letsencrypt/live/webmail.relay.gb.net/fullchain.pem and the private key to /etc/letsencrypt/live/webmail.relay.gb.net/privkey.pem.
Next, restart OpenLiteSpeed and your SSL Certificate should now be installed and working on your VPS Server.
Configure RoundCube Webmail
Next, move into the Roundcube directory and copy the sample configuration files.
cd /var/www/webmail.relay.gb.net/config && cp config.inc.php.sample config.inc.php && nano config.inc.phpIn the console, the config.inc.php file should now be displayed. Locate the line $config[‘db_dsnw’]. It’s near the top. This is the database string in the format of USERNAME:PASSWORD@localhost/DATABASE. Note that if your password contains reserved characters. You need to use the alternate percent encoding. For example, if your password contains ( that would be %28. Please see here for more information.
Below this locate the following lines and add TLS support.
$config['imap_host'] = 'localhost:143';

$config['smtp_host'] = 'localhost:587';
Modify to include your Postfix server hostname;
$config['imap_host'] = 'tls://m1.relay.gb.net:143';

$config['smtp_host'] = 'tls://m2.relay.gb.net:587';
In the same file find the line $config[‘des_key’]. Use a site like Password Generator to create a strong string and replace the default string.
Next, find the section starting // List of active plugins (in plugins/ directory). This is a list of enabled modules. Only two are enabled by default. It will look like this;
$config['plugins'] = [
    'archive',
    'zipdownload',
];
Enable further modules by modifying the code block.
// List of active plugins (in plugins/ directory)
$config['plugins'] = ['acl', 'additional_message_headers', 'archive', 'attachment_reminder', 'autologon', 'debug_logger', 'emoticons', 'enigma', 'filesystem_attachments', 'help', 'hide_blockquote', 'http_authentication', 'identicon', 'identity_select', 'jqueryui', 'krb_authentication', 'managesieve', 'markasjunk', 'new_user_dialog', 'new_user_identity', 'newmail_notifier', 'password', 'reconnect', 'redundant_attachments', 'show_additional_headers', 'squirrelmail_usercopy', 'subscriptions_option', 'userinfo', 'vcard_attachments', 'virtuser_file', 'virtuser_query', 'zipdownload'];
To enable spellchecker add the following line to the same file.
$config['enable_spellcheck'] = true;Finally, look for the below line. If it does not exist in the file add it.
$config['enable_installer'] = true;Access RoundCube Webmail Installer
So at this point, you should be ready to access the RoundCube installer. That’s located in the /installer folder. Access the insaller URL.
https://webmail.relay.gb.net/installer/You should see the initial configuration page and it should all be green at the top.
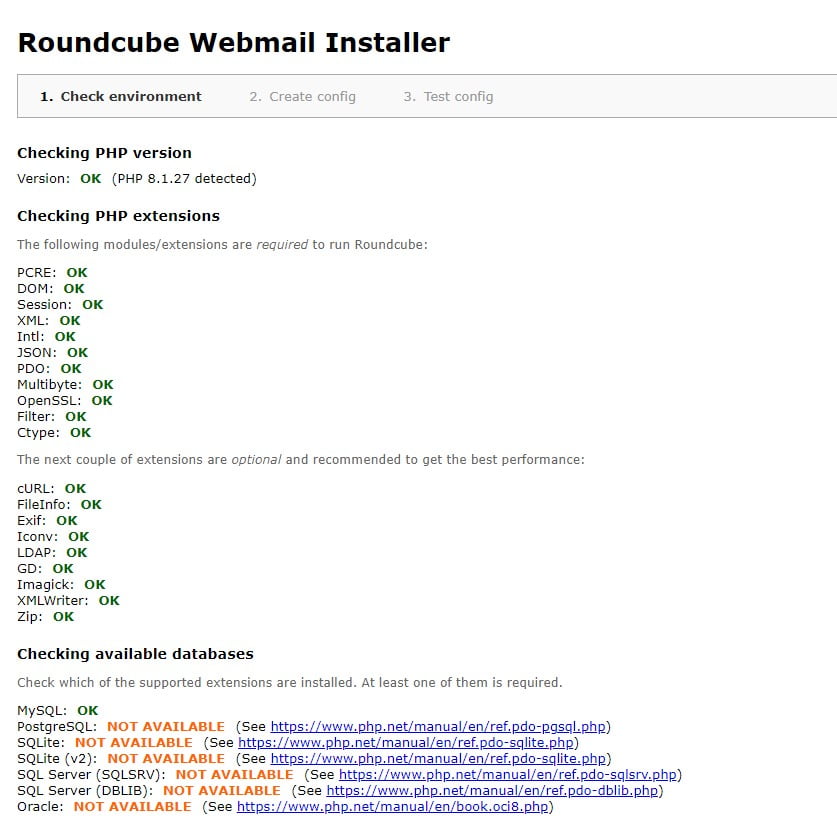
This section is self-explanatory. Click the next button at the bottom of the page and test IMAP and SMTP. You should be able to send test emails. Assuming everything is ok, remove the installer directory.
rm -rf /var/www/webmail.relay.gb.net/installerAlso back in the config.ini.php file comment (//) or remove the $config[‘enable_installer’] = true; line.
nano /var/www/webmail.relay.gb.net/config/config.ini.phpMagic. The install of RoundCube webmail on your Postfix server should now be completed. Access your RoundCube subdomain and log in.
https://webmail.relay.gb.net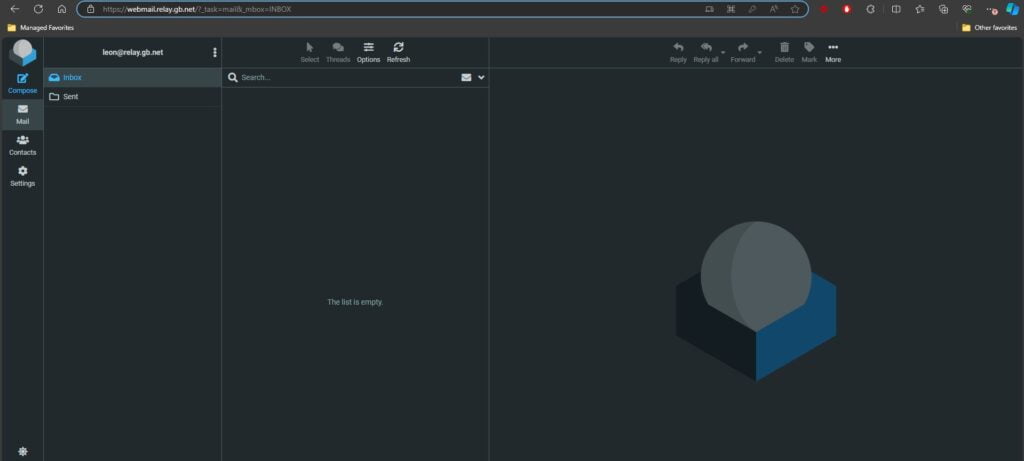
That’s all for this article on Installing RoundCube Webmain in an Ubuntu Postfix Server.