


cPanelsolr was introduced in cPanel version 64. cpanelsolr uses Java to index email messages managed by Dovecot. This guide details how to disable cPanelSolr. cPanel describes the service as;
Fast Email Searching (IMAP Full-Text Search)</strong>
Full-Text Search Indexing (powered by Solr) provides fast search capabilities for IMAP mailboxes. Users of iOS devices, Microsoft® Outlook™, SquirrelMail, Horde, Roundcube, and Mozilla™ Thunderbird will notice significantly improved search speed and convenience.
Unless you have high email usage this is probably not needed. Some reports on the cPanel forums claim the service uses excessive memory resources. Servers with limited memory might struggle to run this service and it would be advisable to disable cpanelsolr.
How to disable cpanelsolr
To disable cpanelsolr in your cPanel Server you can use the service manager inside WHM to enable and disable services. For the purpose of this post, we will just deal with the cpanel-dovecot-solr service.
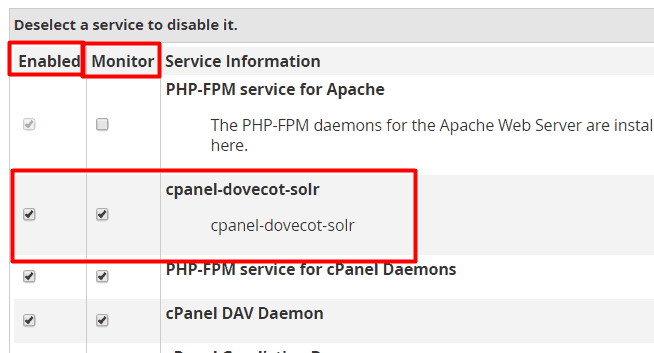
Disable the cpanel-dovecot-solr service.
1- Login to WHM with the root user account.
2- Select “Service Manager”.
3- Once the page loads, untick the two boxes next to the cpanel-dovecot-solr service.
4- Finally, click Save at the bottom of the page.
This will now disable the cpanel-dovecot-solr service and you should notice your memory usage won’t be as high. So it’s important to remember you should only disable this service if you are having problems with it. Or your system is running a low amount of memory. Any system over 4GB of RAM running the defaults provided by cPanel. Should be fine to leave the service enabled.
If you are running a VPS server on CentOS 6.5 or higher check to see if you have v-swap enabled on your server.