


To update CentOS 7 Kernel in your dedicated server our guide will give you step-by-step instructions. To update the Kernel in your KVM VPS check our guide. One of the most important functions of the server is the Kernel. On most systems, the Kernel is one of the first programs to start on your server apart from the Bootloader. The Kernel will deal with input and output requests from a software program and turn those requests into requests your CPU can process. It will handle the memory for any USB attachments plus a Keyboard, mouse and sound peripherals.
Keeping Secure
Keeping your CentOS7 Kernel updated is core to the security of your server. An outdated Kernel will mean people can target specific areas of your server looking for a weakness and will also mean in extreme cases that some programs could stop working or the whole server can fail to load. In this guide, we are going to look at how to update your Kernel in CentOS 7
Update CentOS 7 Kernel
In CentOS 7 you can use the ELRepo repository to update your Kernel. First, update the system
yum update -yNext, check and make a note of the current Kernel deployed to your server.
cat /etc/redhat-release
cat /etc/os-release
uname -msr 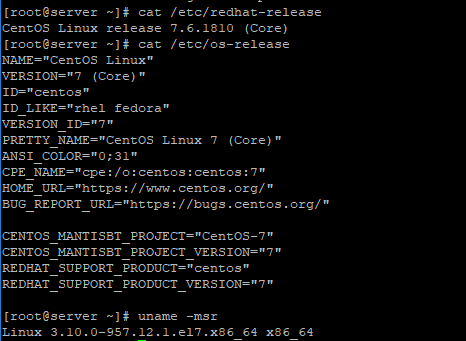
Install ELRepo Repository Key
Next, add the ELRepo Repository Key;
rpm --import https://www.elrepo.org/RPM-GPG-KEY-elrepo.orgNow, add the Repository via RPM;
rpm -Uvh http://www.elrepo.org/elrepo-release-7.0-2.el7.elrepo.noarch.rpmYou can now check to make sure the repositories are enabled;
yum repolist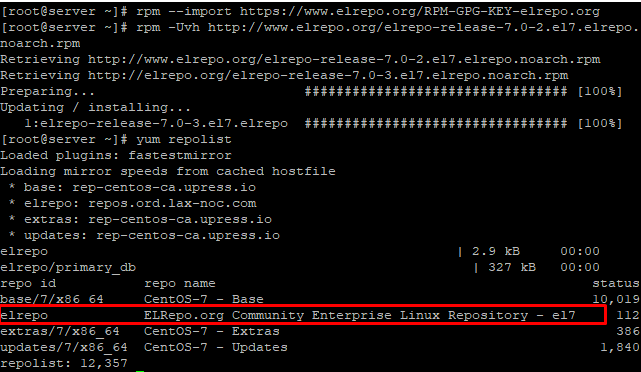
Update CentOS 7 Kernel Dedicated Servers
Now install the latest Kernel. You can see the latest stable version at Kernel.org. In our example, we are using the main-line version (kernel-ml). You can choose kernel-lt for Long Term Support;
yum --enablerepo=elrepo-kernel install kernel-mlUpdate Grub
Now that the Kernel has been updated in your CentOS 7 dedicated server, we need to tell Grub2 that we want to use the new Kernel as the default Kernel on boot. The following command will list all the available Kernels on the system. The latest Kernel should be listed under the 0 field. On First2Host systems, you will see a number of Kernels which we include as standard on all servers. You should aim to keep at least two Kernels and the Rescue Kernel.
awk -F\' '$1=="menuentry " {print i++ " : " $2}' /etc/grub2.cfgUse the following command to make the new Kernel the default Kernel;
grub2-set-default 0If you want to ever revert back to your old Kernel for example if you have a boot issue you can set this back to 1 like this, grub2-set-default 1. Now, all we need to do is generate the configuration file. We use the grub2-mkconfig command to achieve this then we can reboot the system. Consider running a file system check (FSCK) whilst updating the Kernel.
grub2-mkconfig -o /boot/grub2/grub.cfg
reboot
Once the server comes back online make sure the system is using the updated Kernel with the uname -msr command.
uname -msrRemove Old Kernels
To get more space on your server you can remove any old Kernels you. To do this you can use yum-utils. First, install the utils package.
yum install yum-utilsNow use the following command to remove old Kernels from the system. If you have more than 3 Kernels then any old Kernels after the third will be removed. If you get a “No Kernels To Remove” message that means you have less than 3 Kernels on the System.
package-cleanup --oldkernels