


An Ubuntu 22 NFS Server or Network File Share will allow you to share files and directories with other network clients. It’s a little like a fuse mount where you would mount a directory to share documents but much more secure. A great advantage of this is sharing files like OS templates in a Proxmox cluster. Unlike SolusVM where each template needs to be saved on the host, consuming valuable resources, Proxmox has the ability to connect each host to an NFS Server to use a centralized system of templates. So, you can easily create VPS servers. We’ve created a central Ubuntu 22 VM and are going to use this as a central source for our hosts to connect to and download templates from. Because Proxmox comes ready-built with an NFS client this guide will just focus on creating the NFS server and allowing access to the hosts.
Install Proxmox Ubuntu NFS Server
Use apt to download and install the NFS server.
apt install nfs-kernel-serverNext, we need to decide on a name for our shared directory. This is known as an export directory and this is the directory each host will mount. We’re going to use cluster-templates. Note that if you are mounting this directory as an NFS share in Proxmox. Proxmox will create the folder structure in the NFS share for you. For example, Proxmox will create the /mnt/cluster-templates/template/iso folder for you. ISO files would be placed here and then Proxmox will display the files in the GUI.
mkdir -p /mnt/cluster-templatesBecause we need all hosts to have access to the templates, we ensure root is assigned to as the user and group to this folder only. We can use Chown and Chmod to accomplish this.
chown -R root:root /mnt/cluster-templates
chmod 777 /mnt/cluster-templates
Allow Access To Proxmox NFS Server
Because by default all connections to your Proxmox Ubuntu NFS server will be blocked. To allow hosts to connect to our server we need to whitelist the IP they are using. We can whitelist a single IP or a whole subnet. We’re going to whitelist a single /32 IP. Open up the exports file and switch your IP and update the path to your NFS Share.
vi /etc/exports/etc/exports: the access control list for filesystems which may be exported
to NFS clients. See exports(5).
#
Example for NFSv2 and NFSv3:
/srv/homes hostname1(rw,sync,no_subtree_check) hostname2(ro,sync,no_sub>
#
Example for NFSv4:
/srv/nfs4 gss/krb5i(rw,sync,fsid=0,crossmnt,no_subtree_check)
/srv/nfs4/homes gss/krb5i(rw,sync,no_subtree_check)
#
/mnt/cluster-templates 10.10.10.01/32(rw,sync,no_subtree_check)rw means clients have access to read and write, sync writes the data to the disk before they are applied and no_subtree_checks speaks for itself.
Export The NFS Share Directory
Finally, we need to export the share directory and restart the NFS Server to complete the setup.
exportfs -a
systemctl restart nfs-kernel-server
Enable UFW Firewall
To protect the Ubuntu NFS Server configure UFW firewall rules. So let’s add the IP you have allowed in the exports file but remember if you have updated your SSH port to also allow that port.
ufw allow from 10.10.10.01/32 to any port nfs
ufw allow 22
ufw enable
ufw status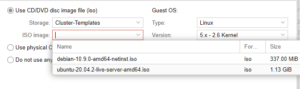
You should now see the NFS port of 2049 with your allowed IP next to it. Next, add your new NFS share to the Proxmox GUI. But upon adding the share Proxmox will create the required directories in your NFS server and you can use wget to place templates in these directories. Learn how to download Proxmox templates to your NFS server in our next guide in this series.