


Mounting a remote folder in RockyLinux, CentOS or AlmaLinux is a great way to access information on a different server. Mounting the FUSE folder into your file system will allow you to drag and drop files into the required folder and the information will then be transferred to the remote location. This is especially good if you want to run cPanel incremental backups but don’t have a second hard drive.
First, we need to add the FUSE repository
yum install epel-release –yInstall FUSE CentOS / RockyLinux / AlmaLinux
Next, let’s install FUSE & CurlFTPS
yum install fuse sshfs –y
yum install curlftpfs -y
Then we need to load the FUSE module
modprobe fuseAt this point, you can confirm FUSE is running by issuing
lsmod | grep fuse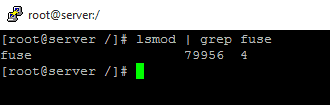
If all went well you should see a screen like this. Now we need to make sure FUSE is loaded on the next reboot. We can add a line to /etc/rc.local to ensure FUSE loads at reboot
echo "modprobe fuse" >> /etc/rc.localThat’s FUSE installed on your Linux VPS Server now let’s mount a remote folder into your file system
If you plan to mount your fuse folder at boot. Skip this section and go straight to the section below.
I’m going to mount a folder called “mount” located in the /home partition on an NVMe VPS server with the IP address 198.162.2.9. I’m going to mount this on my system as “remote”
sshfs root@198.162.2.9:/home/mount /home/remoteYou must create your mount point in your server before issuing the above command. Make sure you are already in the location you want the remote folder to be in and issue “mkdir remote” You can also mount a remote folder using a standard Linux user which would be more secure than using the root user
Sometimes FUSE can get confused and the remote folder is not reachable from your server. If this happens kill the fuse process in your server and unmount the folder using umount -l remote then issue the mount code above again.
How to mount fuse remote folder at boot
In some cases, you may want to mount your remote folder at boot time. You can achieve this with some modifications to the above process. Mounting a remote folder at boot time can cause problems. If the remote mount is mounted before other services during boot time you could end up with an unbootable server. So, you would need to comment out the line we are going to add in the fstab.
Because a password is required to mount the remote storage we will be using a .netrc file to store some credentials. This is a safer way of mounting your remote storage because none of the sensitive details is displayed when browsing screens like df -h
Create a .netrc file
Create the file that will store the remote storage login information.
nano ~/.netrcSo next, inside the file place the login information for the remote storage.
machine 192.168.0.1
login storage@first2host.co.uk
password 73He7Hsodh
Machine – This is the location of your remote storage. the equivalent to hostname when using FTP
Login – The username you use to login to the remote storage
Password – The password you use to login to the remote storage.
Save and close the file.
Modify FSTAB
Now add the fuse mount to the fstab. You only need to specify the machine line in the mount. Fuse will get the other information from the .netrc file.
curlftpfs#192.168.0.1 /mount fuse allow_other,rw,user,noauto 0 0If you encounter the situation described above. You can always comment out this line in the fstab using rescue mode. Just place a # in front of the line. If you haven’t already you can now mount your remote folder
mount /mount