

How to fix default web page cPanel – defaultwebpage.cgi

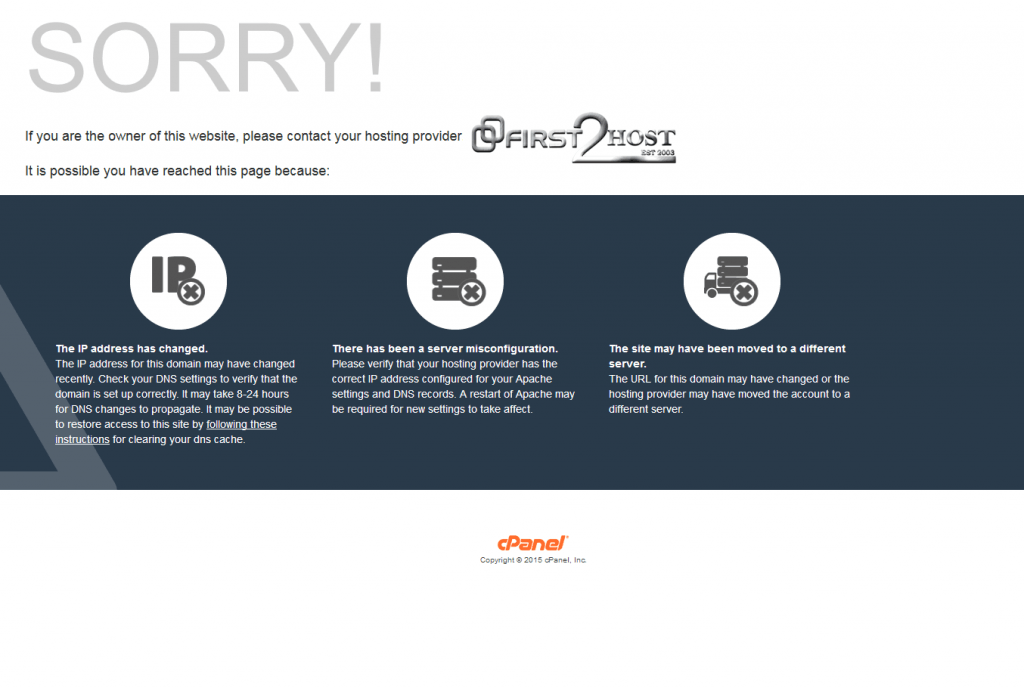
The default web page in cPanel will appear on some websites if you make certain changes to that account. Usually, you will be redirected to /cgi-sys/defaultwebpage.cgi. Things like changing the IP address of the website will cause this page to appear for a number of hours until the DNS has fully updated. If you use our High Availability Web Hosting and you see this page. Please contact our support team as this indicates an error on our network. Customers should never see this page.
Another reason you could see this page is if you have made an error in the website’s DNS configuration. Generally speaking, this page will appear if;
- You change the website IP address.
- There is an error in the DNS zone file.
- The site is moved to a different server.
cPanel Default Web Page
DNS propagation takes between 4 and 24 hours but there are things you can do to reduce this time drastically. Before making any changes.
Set the TTL Tag
The TTL (time to live) tag tells the DNS servers that show your browser where a website is and how often to check that the website is still on the same IP address and in the same place. Set this tag to 5 if possible and then don’t make any changes for 12 hours. This will tell DNS servers to check your site every 5 minutes. This is very useful if you want to migrate websites to a different server.
What to do if you start seeing the default web page
If you have recently made changes to a website and the cPanel default web page now appears when visiting that site, there are a number of things you can do to try to regain access to the web page. Depending on the changes you have made you might be able to restore access by following these guidelines, this won’t work if you have a configuration error in the DNS zone file. You will need to resolve the error first.
Clear your DNS Cache
Your DNS cache keeps a record of the location of websites you have visited if the location (IP address) of the website changes before your local DNS cache updates you will start to see the default Apache web page. You can flush your DNS cache on your local computer which may restore access the website.
Clear your DNS cache on Windows 10/11
- From the search bar on the bottom left type CMD and then right-click the command prompt icon then select “run as administrator” the command prompt screen will open
- In the command prompt type, the below command and press enter
ipconfig /flushdnsYou will see the following message if the command flushed the DNS cache
Windows IP configuration successfully flushed the DNS Resolver CacheClear your DNS cache on Windows 8
- On your keyboard press, WIN+X to open the WinX menu then right click on command prompt and run as the administrator
- In the command prompt type, the below command and press enter
Ipconfig /flushdnsYou will see the following message if the command flushed the DNS cache
Windows IP configuration successfully flushed the DNS Resolver CacheClear your DNS cache on Mac 10 and above
- Click Applications
- Choose Utilities
- Click Terminal
- Run the below command
Sudo killall -HUP mDNSResponder- The above command does NOT give any output
In most cases following this guide will restore access to a website that’s had its IP changed. You could also try using a different browser or using a mobile device on its cellular connection (not WiFi) to navigate to the site to rule out a DNS problem. If the website works on a different device and internet connection, then there is no DNS problem.