

How To Install Microsoft Exchange 2019 on Windows Server 2019

Enterprise email is a must for most businesses these days. Companies want access to Teams, Calendars and more to streamline employees’ days. Microsoft Exchange ticks all of these boxes and more. Currently, you can install the latest version of Microsoft Exchange on Windows Server 2019. It’s not yet compatible with Windows Server 2022. This guide deals with the initial installation prerequisites and the actual install of Exchange Server 2019. To complete this you will need a domain-joined server with active directory working.
Getting Ready
This will likely take a few hours. Ensure your Windows Server 2019 is fully up to date before proceeding. It should be joined to an active directory domain controller with the latest version of Exchange mounted in the server. It’s a good idea to take regular snapshots if you are using a virtual server. Should anything go wrong you can easily roll back. Your server’s hostname should have an A record and respond to pings.
Required Permissions To Install Microsoft Exchange 2019 Install
The Exchange 2019 installation will make a number of Active Directory changes. The user installing Microsoft Exchange 2019 needs to be a member of the following default groups.
- Domain Admin
- Schema Admin
- Enterprise Admin
- Organization Management
- Remote Desktop Users (For RDP Access)
Required Software For Exchange Server 2019 Install
You must have the following software installed on your Server before you are able to install Exchange 2019. Install the required software and reboot the server.
- .NET Framework 4.8 – Download (Reboot after installing)
- Visual C++ Redistributable Package 2012 – Download
- Visual C++ Redistributable Package 2013 – Download
- IIS Rewrite Module – Download
Now open an elevated PowerShell session and install the following software.
Install-WindowsFeature Server-Media-Foundation, NET-Framework-45-Features, RSAT-ADDS, RPC-over-HTTP-proxy, RSAT-Clustering, RSAT-Clustering-CmdInterface, RSAT-Clustering-Mgmt, RSAT-Clustering-PowerShell, Web-Mgmt-Console, WAS-Process-Model, Web-Asp-Net45, Web-Basic-Auth, Web-Client-Auth, Web-Digest-Auth, Web-Dir-Browsing, Web-Dyn-Compression, Web-Http-Errors, Web-Http-Logging, Web-Http-Redirect, Web-Http-Tracing, Web-ISAPI-Ext, Web-ISAPI-Filter, Web-Lgcy-Mgmt-Console, Web-Metabase, Web-Mgmt-Console, Web-Mgmt-Service, Web-Net-Ext45, Web-Request-Monitor, Web-Server, Web-Stat-Compression, Web-Static-Content, Web-Windows-Auth, Web-WMI, Windows-Identity-FoundationAt this point, if you are following our guide on Clustering Microsoft Exchange servers you only now need to start the install process. In an elevated Command Prompt session navigate to the CD-ROM drive and start the install with the below command.
cd /d F:\Setup.exe /IAcceptExchangeServerLicenseTerms /mode:Install /r:MBAt this point, you can return to the guide on Clustering Exchange Servers together.
Only proceed with this guide if you are installing a new Exchange 2019 Server for the first time.
Prepare Active Directory & Schema
The following section deals with A/D. We will install groups and users and prepare the schema. Open a command prompt and navigate to your CD-ROM drive. That’s the drive with the Exchange Server ISO mounted on it. In our example, it’s mounted to F:\. Replace F2HCloud with your organization name.
cd /d F:\

Setup.exe /PrepareSchema /IAcceptExchangeServerLicenseTerms

Setup.exe /PrepareAD /OrganizationName:”F2HCloud” /IAcceptExchangeServerLicenseTerms_DiagnosticDataOn
Install Exchange Server 2019
It’s finally time to install Exchange. Navigate to the drive in your server and open the exchange iso. Right-click setup.exe and install Exchange.
- Accept the license agreement, and click next.
- Choose ‘Recommended settings’, and click next.
- Select Mailbox Role and then ‘Automatically install Windows Server roles and features required to install Exchange Server.’ click ‘next’.
- If you want to install an Exchange server in a different location. Specify the path on this page or proceed with the defaults.
- Enter the organization’s name, for example, F2HCloud
- On the Malware page, choose no for now. We will enable it later.
- Click Install.
The Exchange Server 2019 install will now progress and it will likely take an hour. Grab a coffee. In the final section, we will set up the basics in the new Exchange Server like Outlook anywhere and of course, an SSL certificate.
Basic Exchange Server Configuration
Your server is now installed with Exchange Server 2019. In your active directory, you should notice new groups for Exchange. During installation, the logged-in administrator was added to the correct administration groups. Proceed to log in to the Exchange Servers Administration area.
https://mail.f2hcloud.uk/owaOnce logged in, navigate to Servers > Servers and select the Pencil icon next to your Exchange server. In the list select Outlook anywhere and enter your server’s hostname. Click save.

Configure Service Connection Point (SCP)
SCP allows your users to configure their accounts automatically. In the Exchange Management Shell as an elevated user, issue the below cmdlet switching the variables for your install.
Set-ClientAccessService –Identity NAMEOFSERVER –AutoDiscoverServiceInternalUri https://mail.DomainName.com/Autodiscover/Autodiscover.xmlInstall SSL Certificates In Exchange Server 2019
Finally, it’s time to install the certificates for Exchange. Without this step, you won’t be able to connect to your server using applications like Outlook. It’s important to note. Certificates are installed from the Exchange Administration area. You do not install them via IIS. You must also generate the CSR for the certificate from the panel.
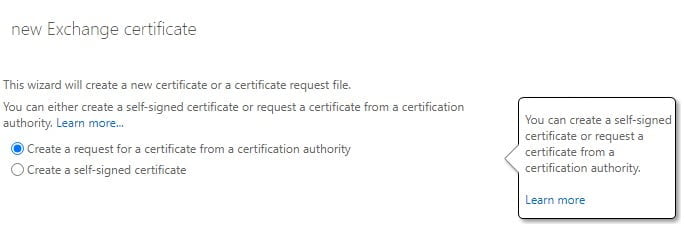
Generate CSR
Still in Servers, select “Certificates” at the top right. Ensure your Exchange server is listed in the drop-down box and click the Pencil Icon. Proceed to generate a CSR and use that to purchase an SSL Certificate. Once you have the certificate, store it somewhere on the server. For example, at C:\Certificates
Install SSL Certificate
Still in the Certificates area. Click the three dots and then Import the Certificate you placed on the server. You need to specify the UNC path to the certificate. For example. If the certificate is located at C:\Cetificates you would use the following path.
\\localhost\c$\Certificates\NameOfCert.crtYou will now see your certificate in the list. It should say “VALID”. All that is left to do is assign it to services. Click the link on the right side and select the services you want the SSL to cover. Usually, you would select IMAP, POP, IIS, SMTP. Click save.
You should now have a working Exchange 2019 server. Users can log in at https://mail.domain.com/owl